

Gary Krebs Popper Jig Sets
GK-B-S
$54.95
Gary Krebs Popper Jig Sets
Product Review: New Fly Tying Tools & Materials for 2012 (Note please, this baby will have staying power)
My-oh-my, this is a cool new gizmo for us fly tying junkies. This Popper Jig Set is a new product for 2012 and distributed by our friends at Hareline Dubbin. I personally, as a world renowned fly tying expert, proclaimed as such by myself after having consumed my second Coors Light of this summer, applaud this Popper Jig Set as the greatest new toy of the month, at least.
My enthusiasm for this popper making tool is based not on my previous experience with tying poppers, because that amounts to zero, but on the fact that this very summer found me suddenly enthused with the possibilities of fishing poppers for both offshore Black Rockfish, for summer steelhead, and for silver and king salmon in estuaries. I know this is weird, because 99% of sane fly tyers in the universe use poppers for Bass or some such fish, and maybe panfish or Peacock Bass or Dorado. But not me. My mind is presently focused on salmon and my newfound friend, the Black Rockfish.
One small matter of special note here about potential uses of popers to entice a little understood but much revered fish named the steelhead. During summer, I have heard, the summer run variety of this species may, on occasion, take debris from the river�s surface. Items typically consumed by these mysterious summer steelhead include twigs, small beaver sticks, leaves (taken one at a time, usually), foam strike indicators, bird feathers in the 2-6� range, small mice, garter snakes, grasshoppers, red-and-white bobbers, and cigarette butts. It is possible, and in fact rumored, that smallish poppers just might, on occasion, entice one of these summer run steelhead to the surface, to inspect or perhaps eat said popper. Just a thought, folks.
My adventure into the art of popper making started from knowing nothing whatsoever. I soon found myself experimenting with hand-cutting popper heads, and using pre-formed popper bodies purchased complete with hooks to glue into slots. These efforts were entertaining, and being semi-retired as I am, and therefore having loads of time to do little more than shuffle around the yard in my grey sweatpants, I was able to devote considerable time to the process of making popper bodies. My creations were OK, I thought, but left me wanting more
Then I was working with Marcos Vergara of Hareline, blathering on about my journey, to find him smiling. Marcos smiled, reached into a cardboard box laying on the floor beside his desk, and pulled out one of these brand-spankin-new Gary Krebs Popper Jig Sets. Actually, he pulled out two such popper jig cutter sets, because they come in two sizes. Arcos sent me scuttling off to give this popper cutter jig set a shakedown, and by gosh, I loved it. I am now a happy popper tyer.
The several short videos featured here show some of the trial and error practices I have explored and learned along my trek into the arcane World of Poppers. I still am very new to this skill set, but I am really pleased with the products that I have been able to achieve with this popper jig set. If it were up to me I would have named this a Popper Cutter set, because that is what we do: we use the jig set as a cutter to shape our poppers.
The basic tool (Gary Krebs Popper Jig Set) is available in two sizes: the smaller of the two sets is described as the Bass and Bonefish size and the larger size is described simply as the Saltwater size.
Here are some observations based on my experience to date with the Gary Krebs Popper Jig set and cutting my very own popper heads.
Popper Jig Sets are offered in Two sizes. This is a little confusing, because if you look at the River Road Creations Foam Cylinders that are recommended for use with these Popper Jigs, you will only find five sizes. Since each popper jig set has three jigs, I was at first wondering what happened to the sixth foam cylinder size?
The foam is offered in _�; 5/16�; 3/8�; 7/16�; and _� sizes. After a little head-scratching, I figured out that the middle size (3/8�) jig is included in both the small and large size set. Ah-ha, that explains it.
Most useful popper jig size. To date, I find that all but the smallest and largest size popper bodies are very pleasing and seem to offer the most versatility for the fishing that I plan doing. The smallest size seems like a trout or panfish popper and the largest seems a Bass or big saltwater fish lure size. If forces to choose one popper jig set for steelhead, I would resist, because I really like the three middle sizes of poppers you can make, and this requires two Jig Sets. Nice move Gary.
Cutting poppers. The Popper Jig sets come with a razor blade and a needle. The needle is useful to hold the foam in place but I have found it less than useful to thread rubber legs through the body. For this I drill a hole and use a bobbin threader or a piece of 15 Lb. mono leader to do the threading. Personally, I do not like the supplied razor blade, finding it too small and flexible to handle very well. I simply buy cheap single edge razor blades from a hardware store, the kind one uses to scrape paint from glass. These have a firm edge, can be sharpened, and I find them easier to hold.
Creation of a popper body requires three cuts. 1. cut the face of the popper by sliding the blade across the front of the wooden jig. This creates an angles front end of the popper. 2. cut the rear taper to the popper, again by sliding the blade across the rear angled surface. 3. make the final cut on the foam cylinder, sliding the blade into a slot in the jig. This finishes your popper.
Each Foam Cylinder makes two popper bodies - except for the largest diameter cylinder, which is only long enough to allow you to cut one popper body per cylinder.
Making slits for hooks. Now that you have a popper body, turn it upside down, hold it nice and straight, and make a slit running true and upright from front to back of the body. Try not to waver or wiggle in this process - this is where the firmness of the razor blade comes in handy too.
Gluing hooks into foam. I have had my best glue-jobs using Zap Gel. I hold the popper body and pinch it so that the slit stays open. Then I run a bead of Zap gel along the slit. Then I smoothly (ha ha) push the bare hook into the slit. If thread has been applied to the hook, it is more difficult to insert the hook, because the Zap Gel tries to lock onto the thread immediately upon contact. At this point, I continue to hold the popper body and squeeze the slit shut long enough for it to dry closed. Sometimes I succeed (the slit must be deep enough to envelope the hook) and sometimes not. In either case, the bond seems durable.
Drilling rubber leg holes. I insert a 4" length of metal tube, bass, steel, or even aluminum, into a hand drill. I have used thin wall tubing from a hobby shop and thin aluminum tube from my tube fly supplies. Once inserted into the drill, i take a fine file to sharpen the tip of the tube. You can do this by holding the file to the tip of the tube while spinning the drill. This creates a sharp end to the tube, and you then simply push this sharpened tube into the foam popper body (with the drill rotating at moderate speed) to drill out a plug of foam. The inside diameter of the tube dictates the size of the hole you will drill. I tried using a standard drill on the foam and it just made a mess of the foam. This hollow tube trick really works. I drill the hole above the level where the hook shank will rest. A nice wad of rubber legs can now be pulled hrough the popper body with bobbin threader or a doubled section of mono. Thicker wads of rubber legs require a larger diameter hole.
Tying onto the rear of hook. Depending on the length of the hook d=shank, plus the amount of material one hopes to tie on the rear of the popper body, this can be challenging. My preference leans to shorter shank hooks and modest amounts of materials. I find that a drop of Zap Gel applied to thread base butted up to the popper body assures that the materials added at this point will stay in place.
Hooks to use. Ring-eye hooks are preferable to down or up eye hooks. Long shank hooks make the process of adding materials behind the popper easier, but may provide leverage for hook throwing antics on the part of the fish.
Errors to avoid. 1. using a hook with soo litle gape for the popper body; make sure the hook will be clear of the body to avoid this error. 2. try to make sure that the slits for hooks are cut straight up into the popper body, not at a slant. This takes a little practice, but it ensures that your hook will seat straight dow in the water. 3. Too-Shallow slits cut for hooks will make it impossible to properly seat the hook into the foam. 4. Super glue left in the hook eye will make the popper basically unusable. Clear it from the eyes after inserting the hook. A piece of mono leader will accomplish this task.
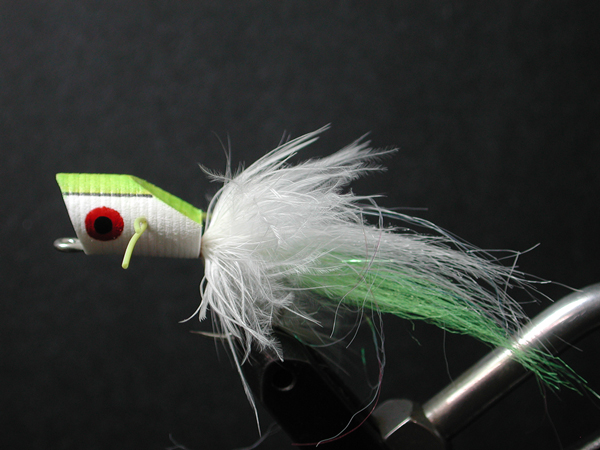
Summary. The poppers cut from River Road Foam cylinders are easy to make, the finished poppers are elegant, cast very well, and Oh my, they push a nice puddle of water 3-6� in air (depending on popper size) when stripped. The Gary Krebs Popper Jigs are a winning innovation.
Jay Nicholas
If you have ever wondered how the comercial poppers you see in shops are formed, wonder no more. These Gary Krebs Poper Jig Sets give tyers the option of cutting 5 sizes of poppers. We recommend the use of River Road Foam Cylinders for achieving consistent and simple results.
Product Review: New Fly Tying Tools & Materials for 2012 (Note please, this baby will have staying power)
My-oh-my, this is a cool new gizmo for us fly tying junkies. This Popper Jig Set is a new product for 2012 and distributed by our friends at Hareline Dubbin. I personally, as a world renowned fly tying expert, proclaimed as such by myself after having consumed my second Coors Light of this summer, applaud this Popper Jig Set as the greatest new toy of the month, at least.
My enthusiasm for this popper making tool is based not on my previous experience with tying poppers, because that amounts to zero, but on the fact that this very summer found me suddenly enthused with the possibilities of fishing poppers for both offshore Black Rockfish, for summer steelhead, and for silver and king salmon in estuaries. I know this is weird, because 99% of sane fly tyers in the universe use poppers for Bass or some such fish, and maybe panfish or Peacock Bass or Dorado. But not me. My mind is presently focused on salmon and my newfound friend, the Black Rockfish.
One small matter of special note here about potential uses of popers to entice a little understood but much revered fish named the steelhead. During summer, I have heard, the summer run variety of this species may, on occasion, take debris from the river�s surface. Items typically consumed by these mysterious summer steelhead include twigs, small beaver sticks, leaves (taken one at a time, usually), foam strike indicators, bird feathers in the 2-6� range, small mice, garter snakes, grasshoppers, red-and-white bobbers, and cigarette butts. It is possible, and in fact rumored, that smallish poppers just might, on occasion, entice one of these summer run steelhead to the surface, to inspect or perhaps eat said popper. Just a thought, folks.
My adventure into the art of popper making started from knowing nothing whatsoever. I soon found myself experimenting with hand-cutting popper heads, and using pre-formed popper bodies purchased complete with hooks to glue into slots. These efforts were entertaining, and being semi-retired as I am, and therefore having loads of time to do little more than shuffle around the yard in my grey sweatpants, I was able to devote considerable time to the process of making popper bodies. My creations were OK, I thought, but left me wanting more
Then I was working with Marcos Vergara of Hareline, blathering on about my journey, to find him smiling. Marcos smiled, reached into a cardboard box laying on the floor beside his desk, and pulled out one of these brand-spankin-new Gary Krebs Popper Jig Sets. Actually, he pulled out two such popper jig cutter sets, because they come in two sizes. Arcos sent me scuttling off to give this popper cutter jig set a shakedown, and by gosh, I loved it. I am now a happy popper tyer.
The several short videos featured here show some of the trial and error practices I have explored and learned along my trek into the arcane World of Poppers. I still am very new to this skill set, but I am really pleased with the products that I have been able to achieve with this popper jig set. If it were up to me I would have named this a Popper Cutter set, because that is what we do: we use the jig set as a cutter to shape our poppers.
The basic tool (Gary Krebs Popper Jig Set) is available in two sizes: the smaller of the two sets is described as the Bass and Bonefish size and the larger size is described simply as the Saltwater size.
Here are some observations based on my experience to date with the Gary Krebs Popper Jig set and cutting my very own popper heads.
Popper Jig Sets are offered in Two sizes. This is a little confusing, because if you look at the River Road Creations Foam Cylinders that are recommended for use with these Popper Jigs, you will only find five sizes. Since each popper jig set has three jigs, I was at first wondering what happened to the sixth foam cylinder size?
The foam is offered in _�; 5/16�; 3/8�; 7/16�; and _� sizes. After a little head-scratching, I figured out that the middle size (3/8�) jig is included in both the small and large size set. Ah-ha, that explains it.
Most useful popper jig size. To date, I find that all but the smallest and largest size popper bodies are very pleasing and seem to offer the most versatility for the fishing that I plan doing. The smallest size seems like a trout or panfish popper and the largest seems a Bass or big saltwater fish lure size. If forces to choose one popper jig set for steelhead, I would resist, because I really like the three middle sizes of poppers you can make, and this requires two Jig Sets. Nice move Gary.
Cutting poppers. The Popper Jig sets come with a razor blade and a needle. The needle is useful to hold the foam in place but I have found it less than useful to thread rubber legs through the body. For this I drill a hole and use a bobbin threader or a piece of 15 Lb. mono leader to do the threading. Personally, I do not like the supplied razor blade, finding it too small and flexible to handle very well. I simply buy cheap single edge razor blades from a hardware store, the kind one uses to scrape paint from glass. These have a firm edge, can be sharpened, and I find them easier to hold.
Creation of a popper body requires three cuts. 1. cut the face of the popper by sliding the blade across the front of the wooden jig. This creates an angles front end of the popper. 2. cut the rear taper to the popper, again by sliding the blade across the rear angled surface. 3. make the final cut on the foam cylinder, sliding the blade into a slot in the jig. This finishes your popper.
Each Foam Cylinder makes two popper bodies - except for the largest diameter cylinder, which is only long enough to allow you to cut one popper body per cylinder.
Making slits for hooks. Now that you have a popper body, turn it upside down, hold it nice and straight, and make a slit running true and upright from front to back of the body. Try not to waver or wiggle in this process - this is where the firmness of the razor blade comes in handy too.
Gluing hooks into foam. I have had my best glue-jobs using Zap Gel. I hold the popper body and pinch it so that the slit stays open. Then I run a bead of Zap gel along the slit. Then I smoothly (ha ha) push the bare hook into the slit. If thread has been applied to the hook, it is more difficult to insert the hook, because the Zap Gel tries to lock onto the thread immediately upon contact. At this point, I continue to hold the popper body and squeeze the slit shut long enough for it to dry closed. Sometimes I succeed (the slit must be deep enough to envelope the hook) and sometimes not. In either case, the bond seems durable.
Drilling rubber leg holes. I insert a 4" length of metal tube, bass, steel, or even aluminum, into a hand drill. I have used thin wall tubing from a hobby shop and thin aluminum tube from my tube fly supplies. Once inserted into the drill, i take a fine file to sharpen the tip of the tube. You can do this by holding the file to the tip of the tube while spinning the drill. This creates a sharp end to the tube, and you then simply push this sharpened tube into the foam popper body (with the drill rotating at moderate speed) to drill out a plug of foam. The inside diameter of the tube dictates the size of the hole you will drill. I tried using a standard drill on the foam and it just made a mess of the foam. This hollow tube trick really works. I drill the hole above the level where the hook shank will rest. A nice wad of rubber legs can now be pulled hrough the popper body with bobbin threader or a doubled section of mono. Thicker wads of rubber legs require a larger diameter hole.
Tying onto the rear of hook. Depending on the length of the hook d=shank, plus the amount of material one hopes to tie on the rear of the popper body, this can be challenging. My preference leans to shorter shank hooks and modest amounts of materials. I find that a drop of Zap Gel applied to thread base butted up to the popper body assures that the materials added at this point will stay in place.
Hooks to use. Ring-eye hooks are preferable to down or up eye hooks. Long shank hooks make the process of adding materials behind the popper easier, but may provide leverage for hook throwing antics on the part of the fish.
Errors to avoid. 1. using a hook with soo litle gape for the popper body; make sure the hook will be clear of the body to avoid this error. 2. try to make sure that the slits for hooks are cut straight up into the popper body, not at a slant. This takes a little practice, but it ensures that your hook will seat straight dow in the water. 3. Too-Shallow slits cut for hooks will make it impossible to properly seat the hook into the foam. 4. Super glue left in the hook eye will make the popper basically unusable. Clear it from the eyes after inserting the hook. A piece of mono leader will accomplish this task.
Summary. The poppers cut from River Road Foam cylinders are easy to make, the finished poppers are elegant, cast very well, and Oh my, they push a nice puddle of water 3-6� in air (depending on popper size) when stripped. The Gary Krebs Popper Jigs are a winning innovation.
Jay Nicholas
If you have ever wondered how the comercial poppers you see in shops are formed, wonder no more. These Gary Krebs Poper Jig Sets give tyers the option of cutting 5 sizes of poppers. We recommend the use of River Road Foam Cylinders for achieving consistent and simple results.
Gary Krebs Popper Jigs and Krebs Popper Fly from Ian Anderson on Vimeo.
Gary Krebs Popper from Third Coast Fly on Vimeo.
